728x90
반응형
소셜 로그인 구현 첫번째는 페이스북 로그인 입니다.
파이어베이스 사용여부와 상관없이 세팅방법은 똑같습니다.
Meta for Developers
Conversations 2022: 제1회 Meta 비즈니스 메시지 콘퍼런스 가장 인기 있는 메시지 플랫폼에서 더욱 빠르고 개선된 경험을 구축하고자 하는 비즈니스, 개발자 및 파트너를 위한 제1회 콘퍼런스를 개최
developers.facebook.com
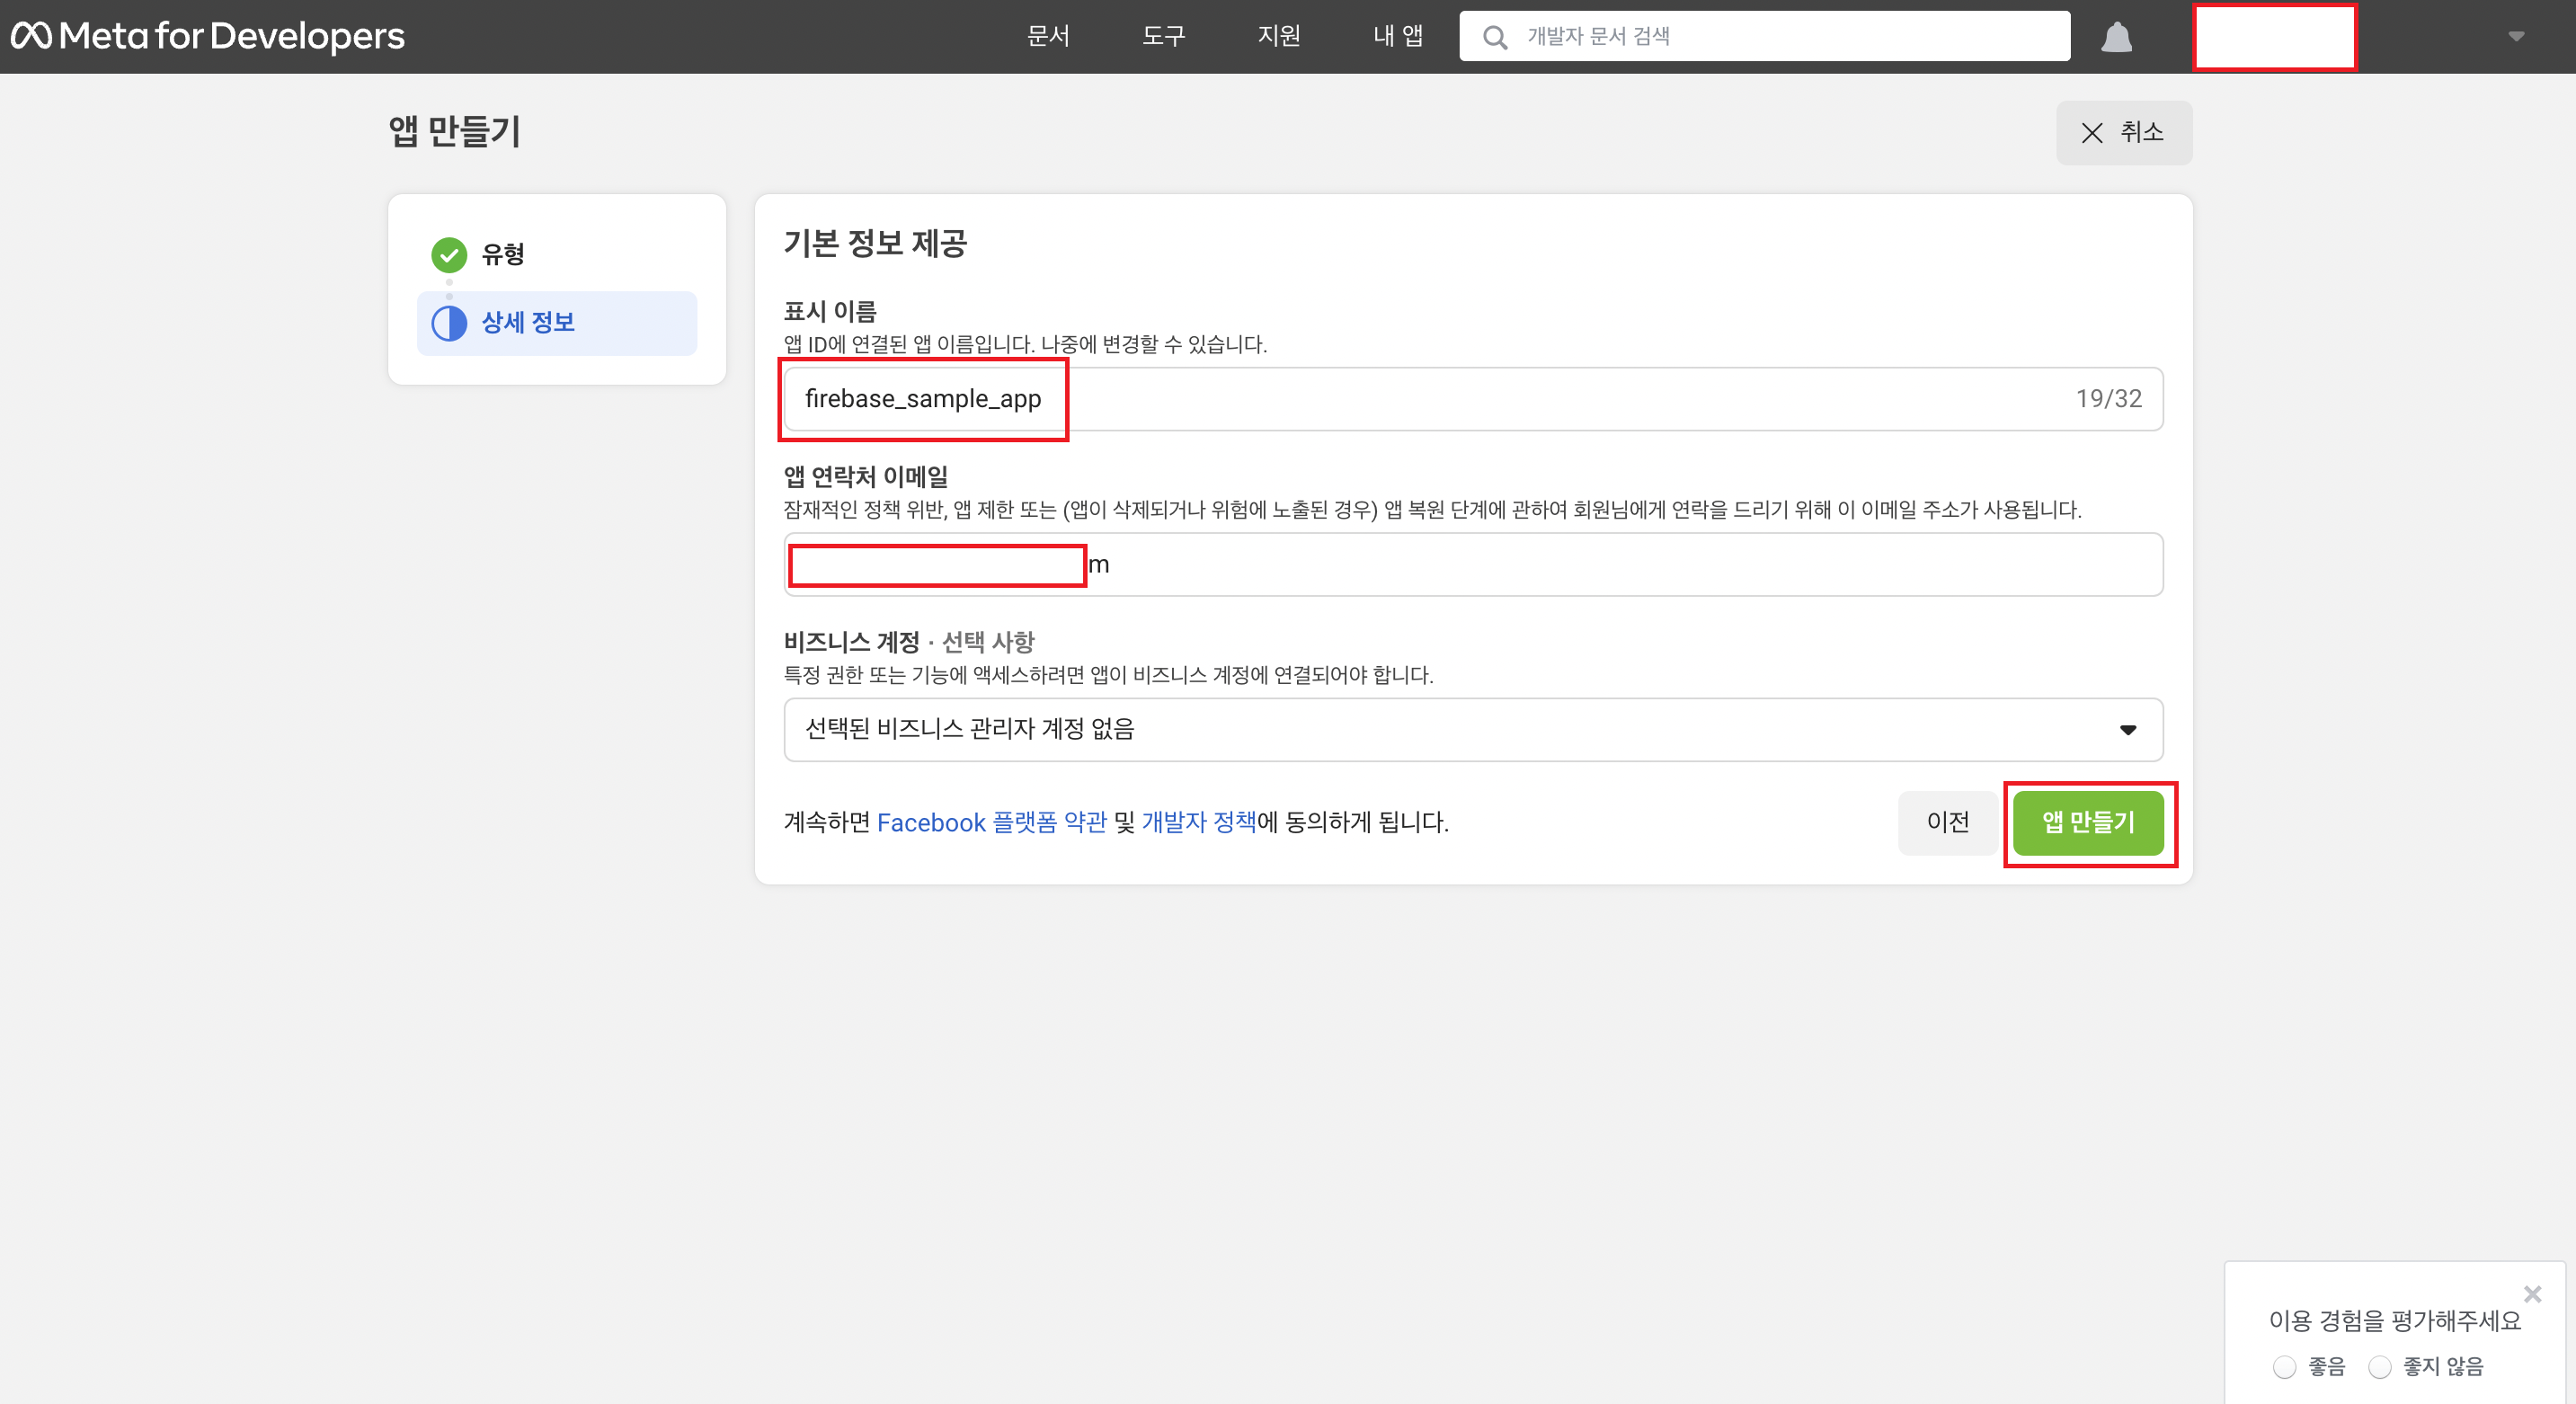
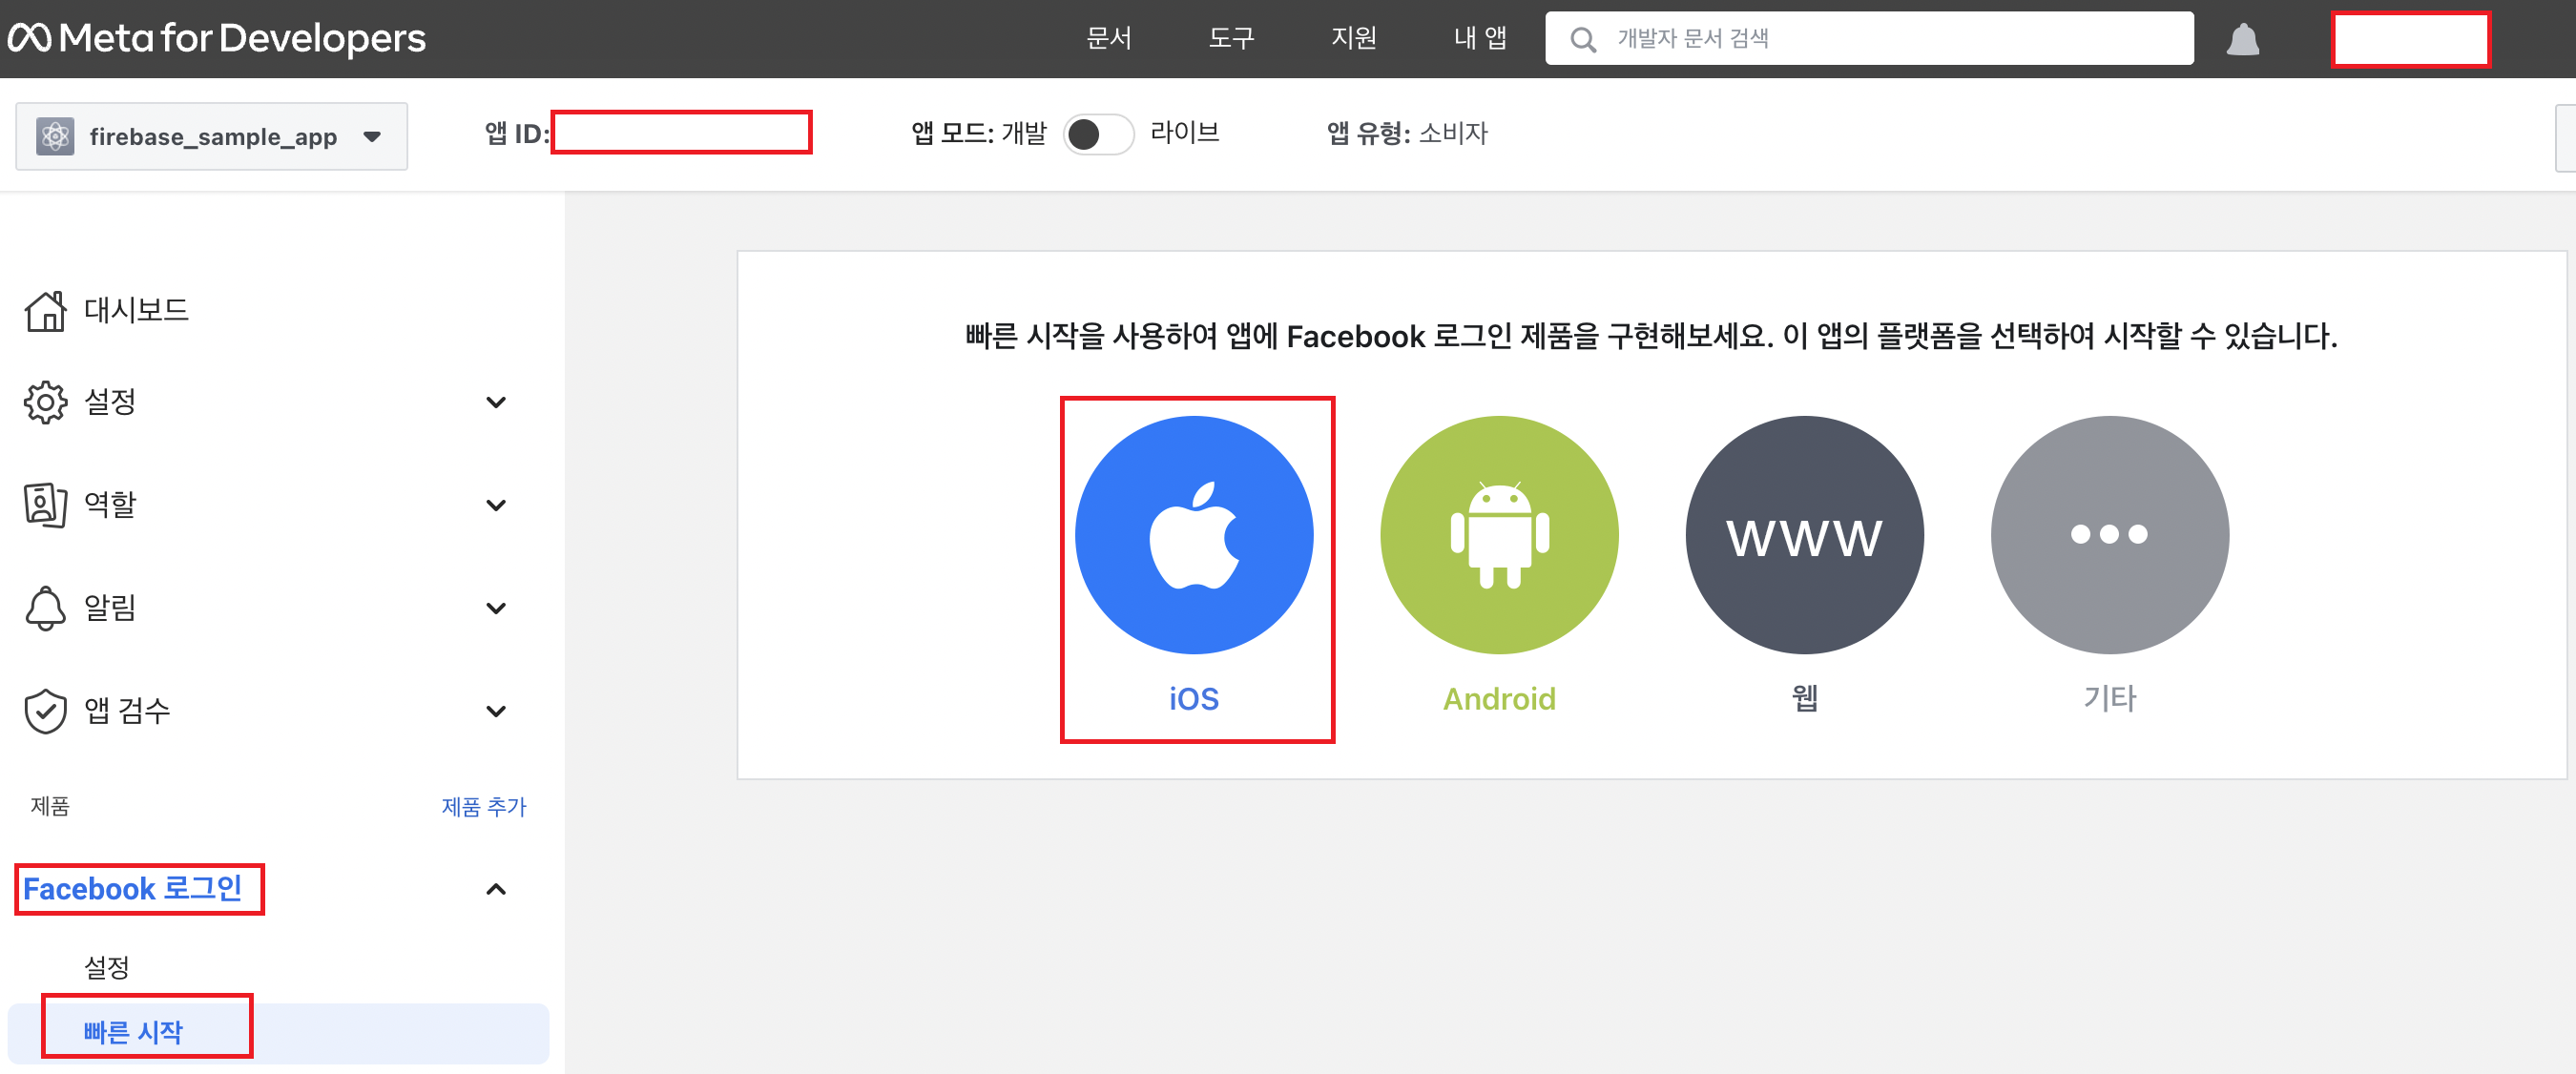
앱 만들기
- 로그인 후 '내 앱' 클릭

- '앱 만들기' 클릭

- 유형은 소비자 , 상세정보에서는 표시할 이름을 넣어줍니다.

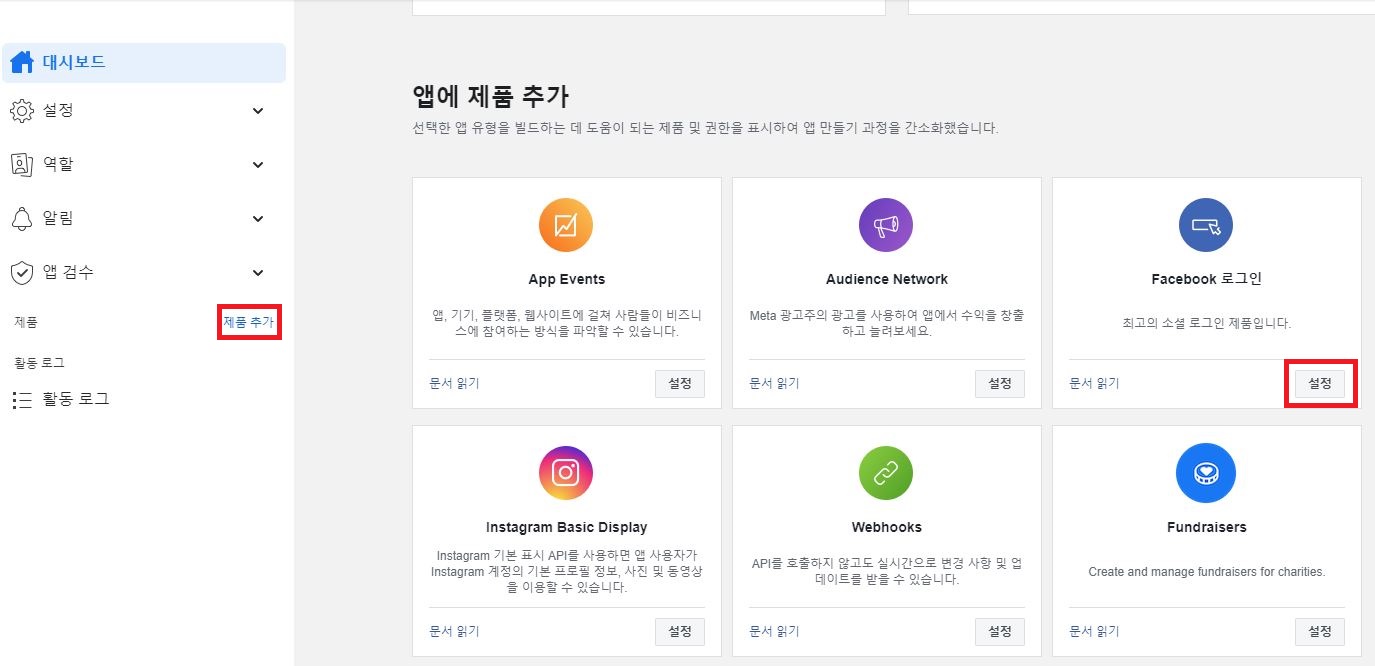
- 대시보드에서 제품추가 >> Facebook 로그인 설정 을 눌러줍니다.
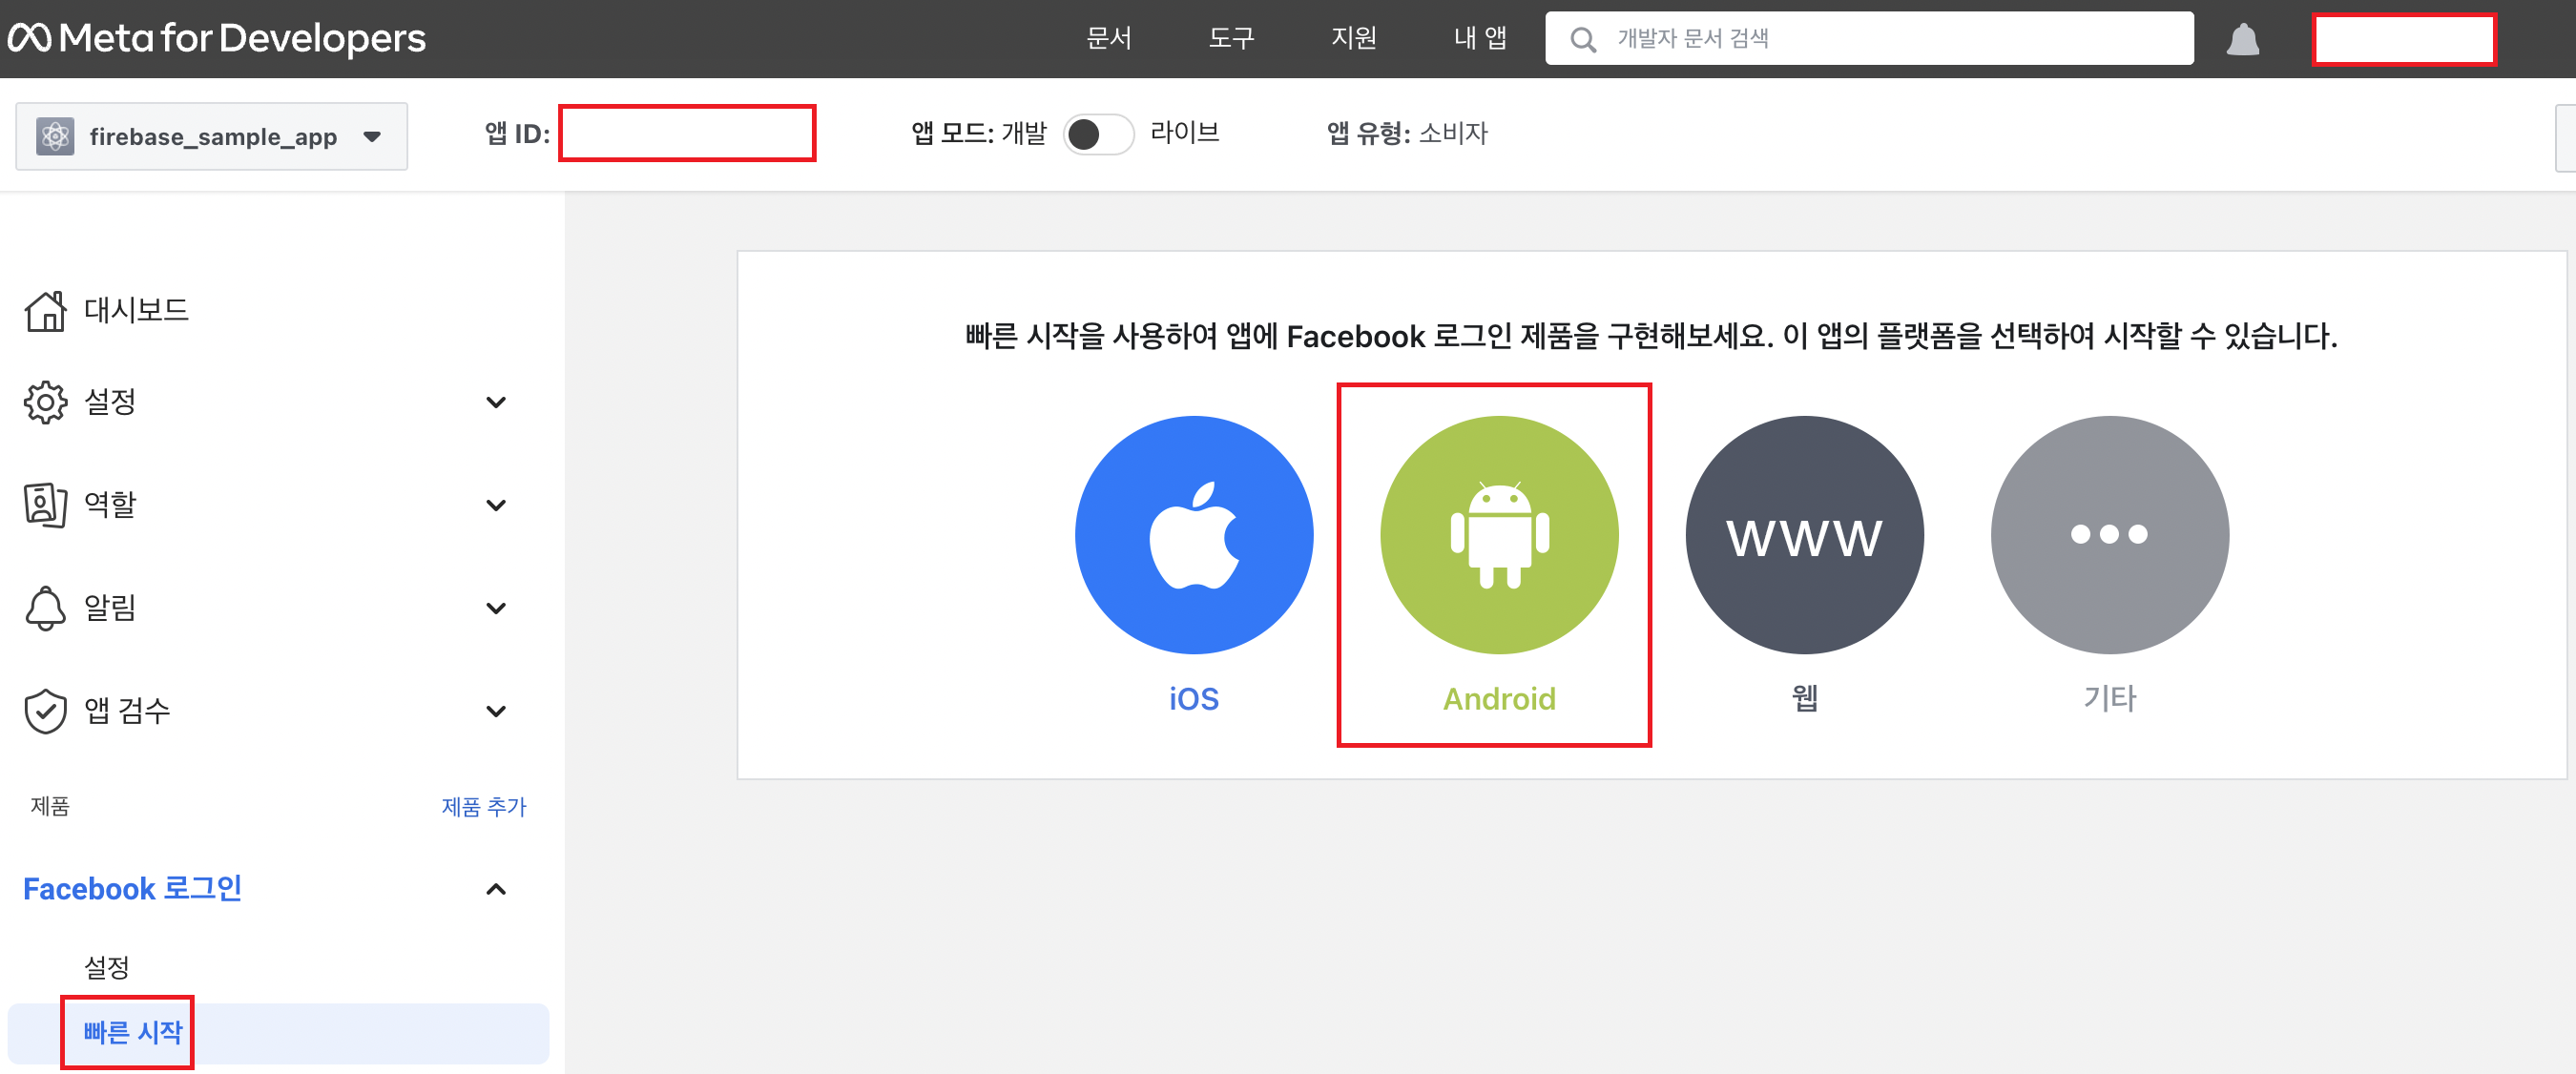
Android 설정
- 빠른 시작에서 안드로이드를 눌러줍니다.
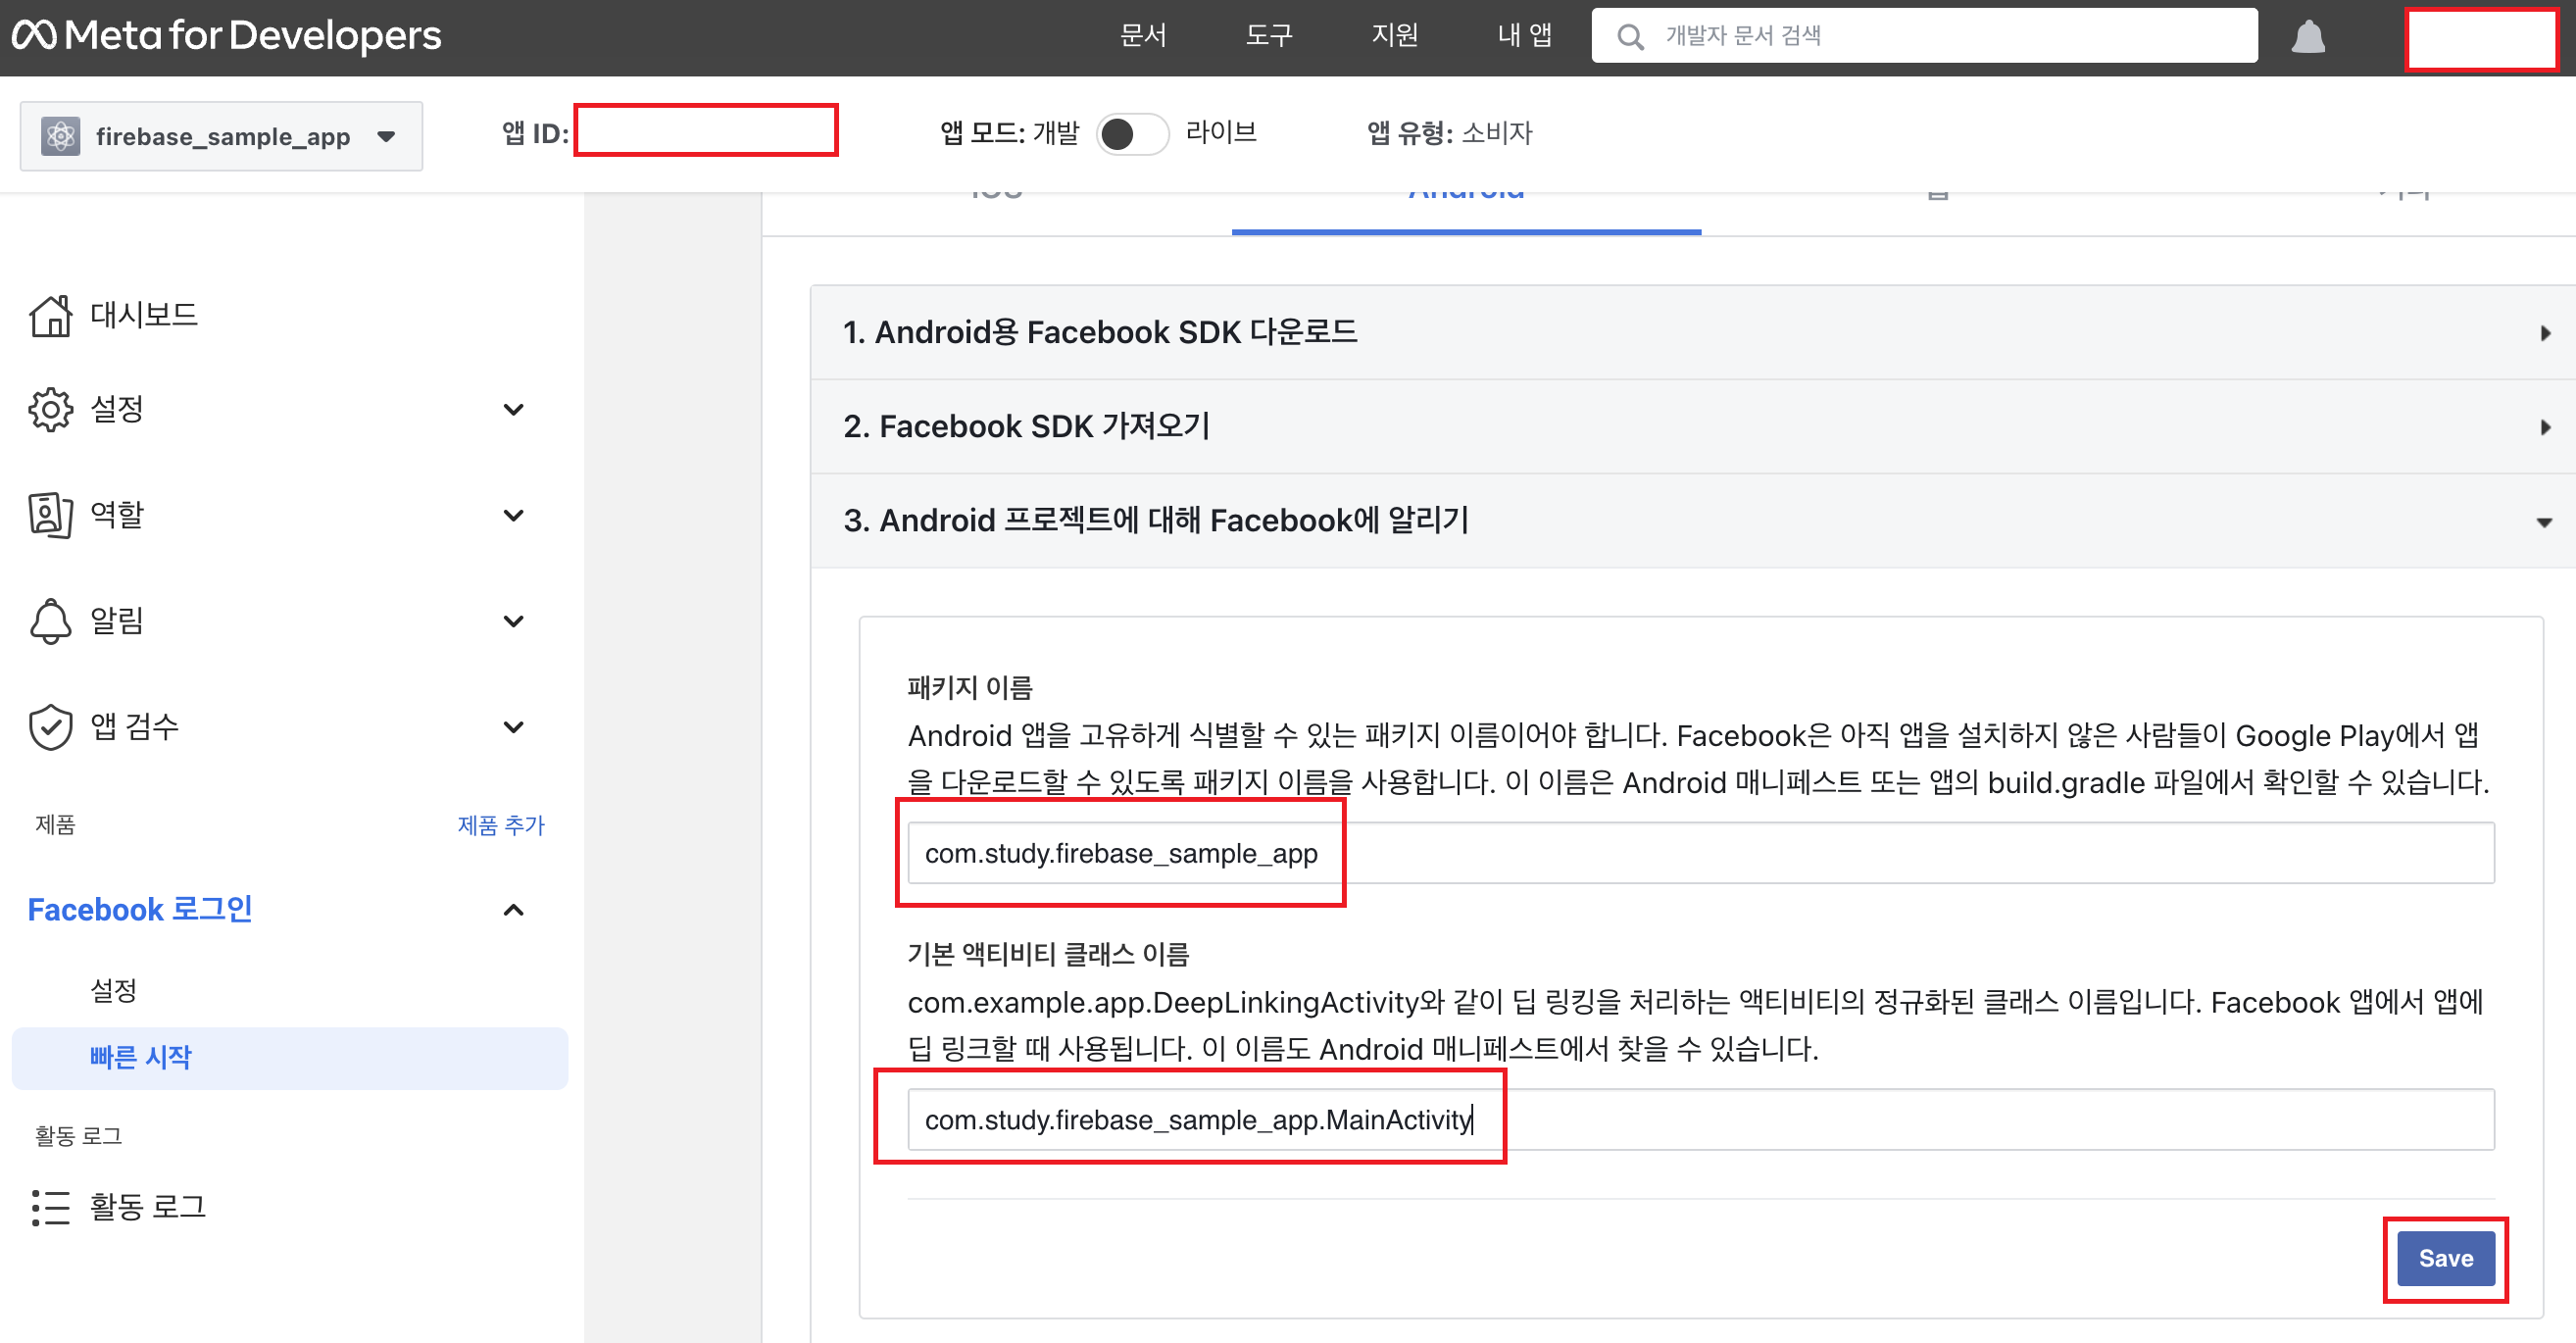
- 1,2 번은 생략하고 3번에서 패키지 이름과 패키지 이름.MainActivity 를 넣어줍니다.
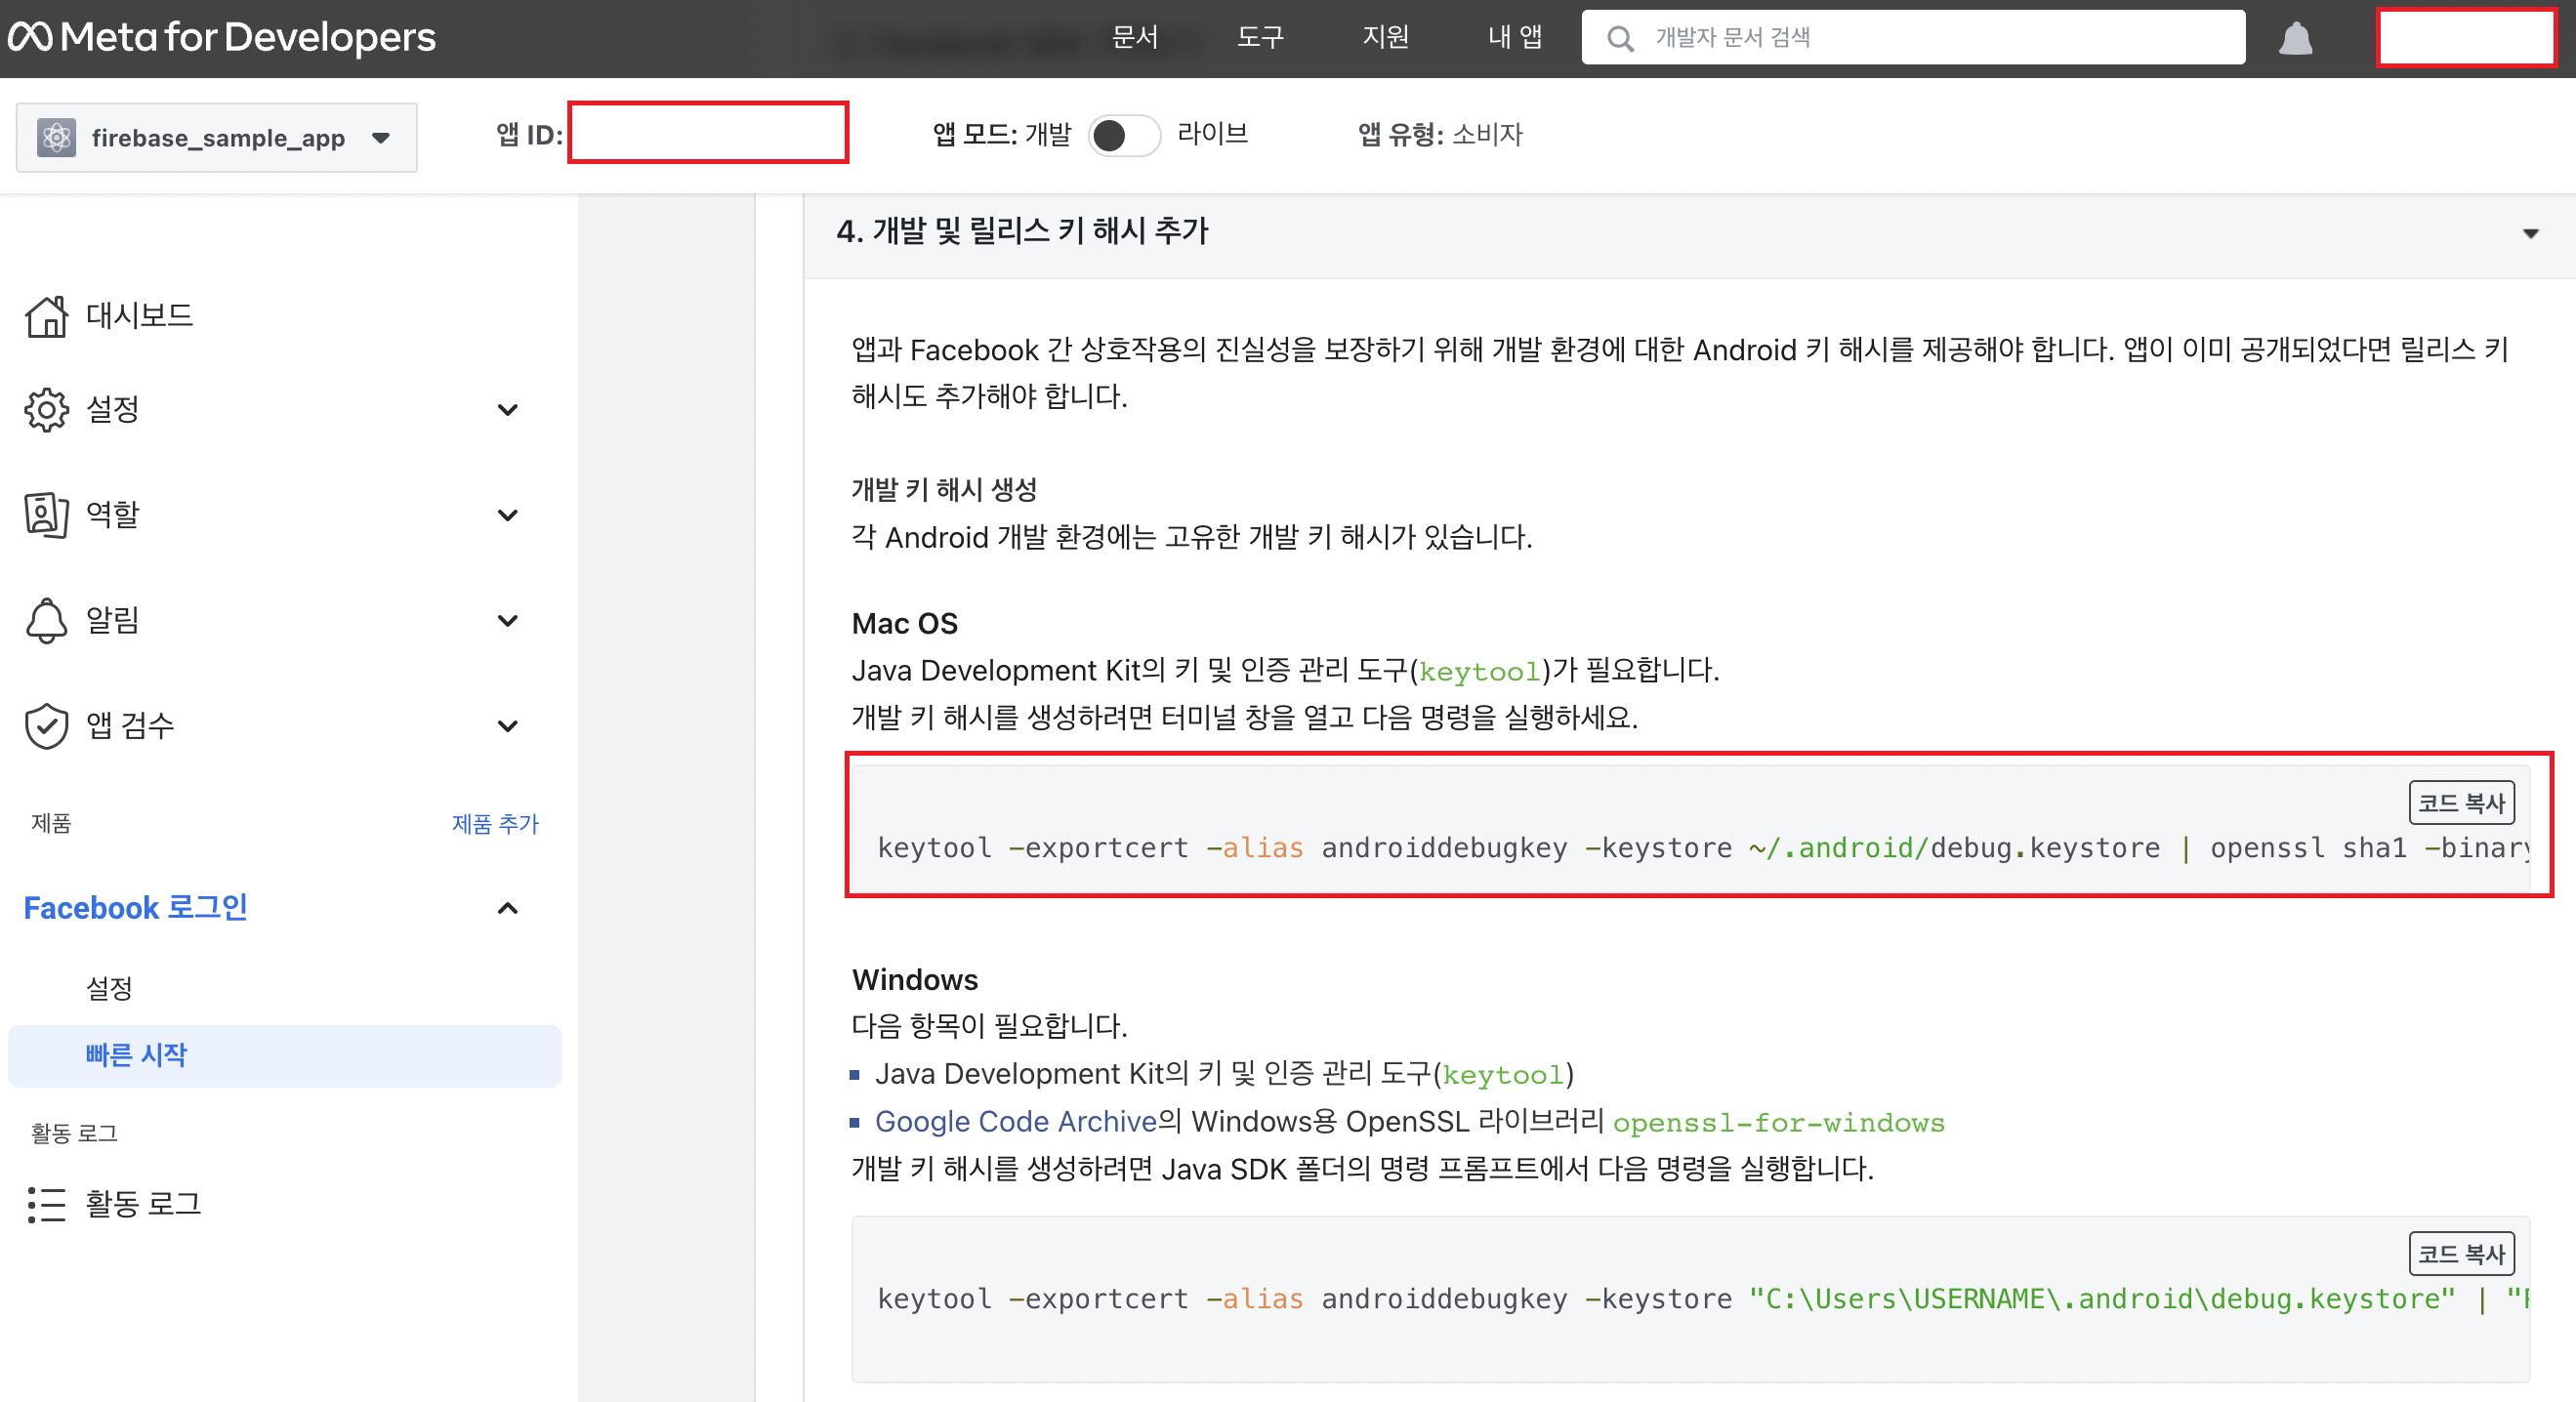
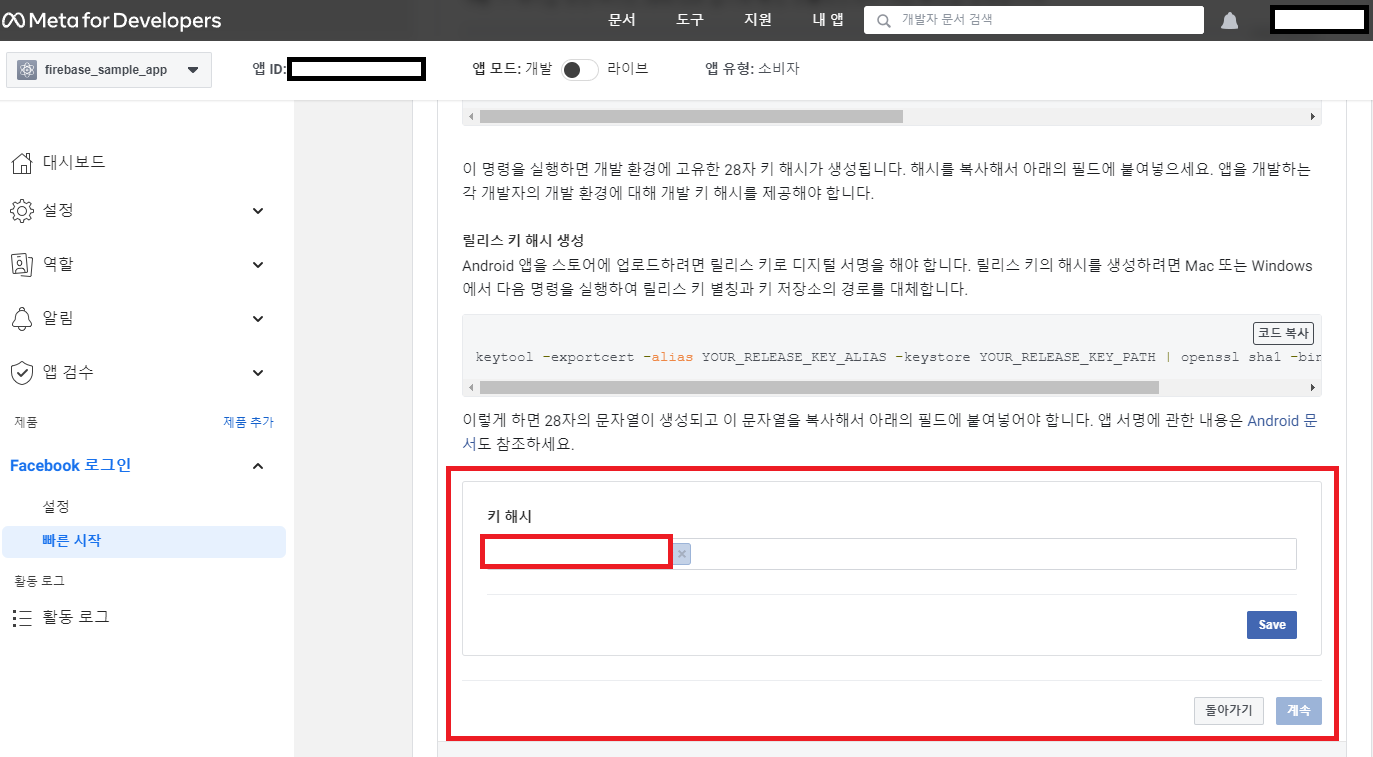
- 터미널에서 해당 명령어를 적고 키해시를 받아서 입력해주세요.
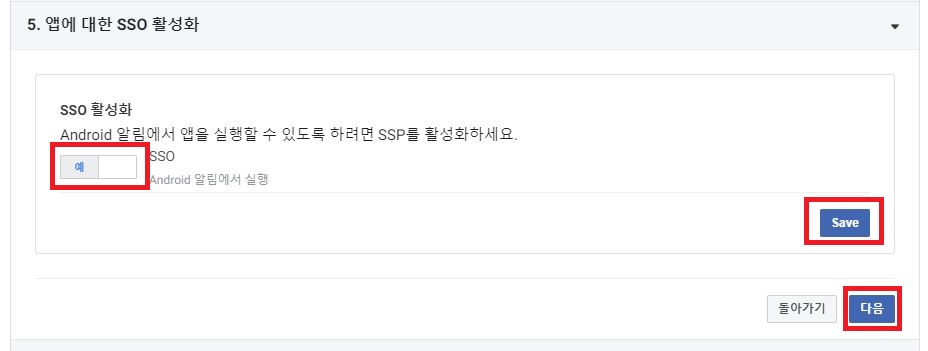
- SSO 활성화 에서 '예' 설정
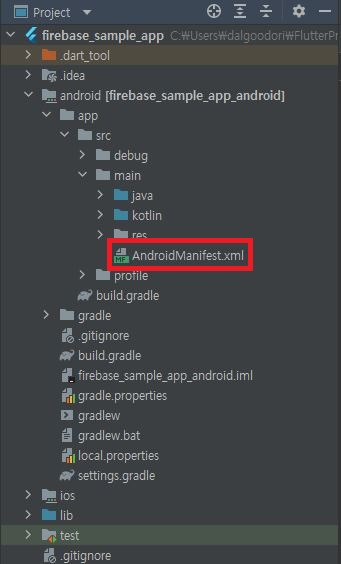
AndroidManifest 설정
android / app / src / main / res / values / strings.xml
- strings.xml 이 없을 수 있습니다. 직접 만들어 주고 아래의 코드를 넣어줍니다.

<?xml version="1.0" encoding="utf-8"?>
<resources>
    <string name="app_name">app_name</string>
    <string name="facebook_app_id">1234</string>
    <string name="fb_login_protocol_scheme">fb1234</string>
    <string name="facebook_client_token">56789</string>
</resources>
- app_id 는 대시보드 상단에 있습니다.
- fb_login_protocol_scheme 는 fb + app_id 입니다. ex) app_id 가 1234 라면 fb_login_protocol_scheme 는 fb1234
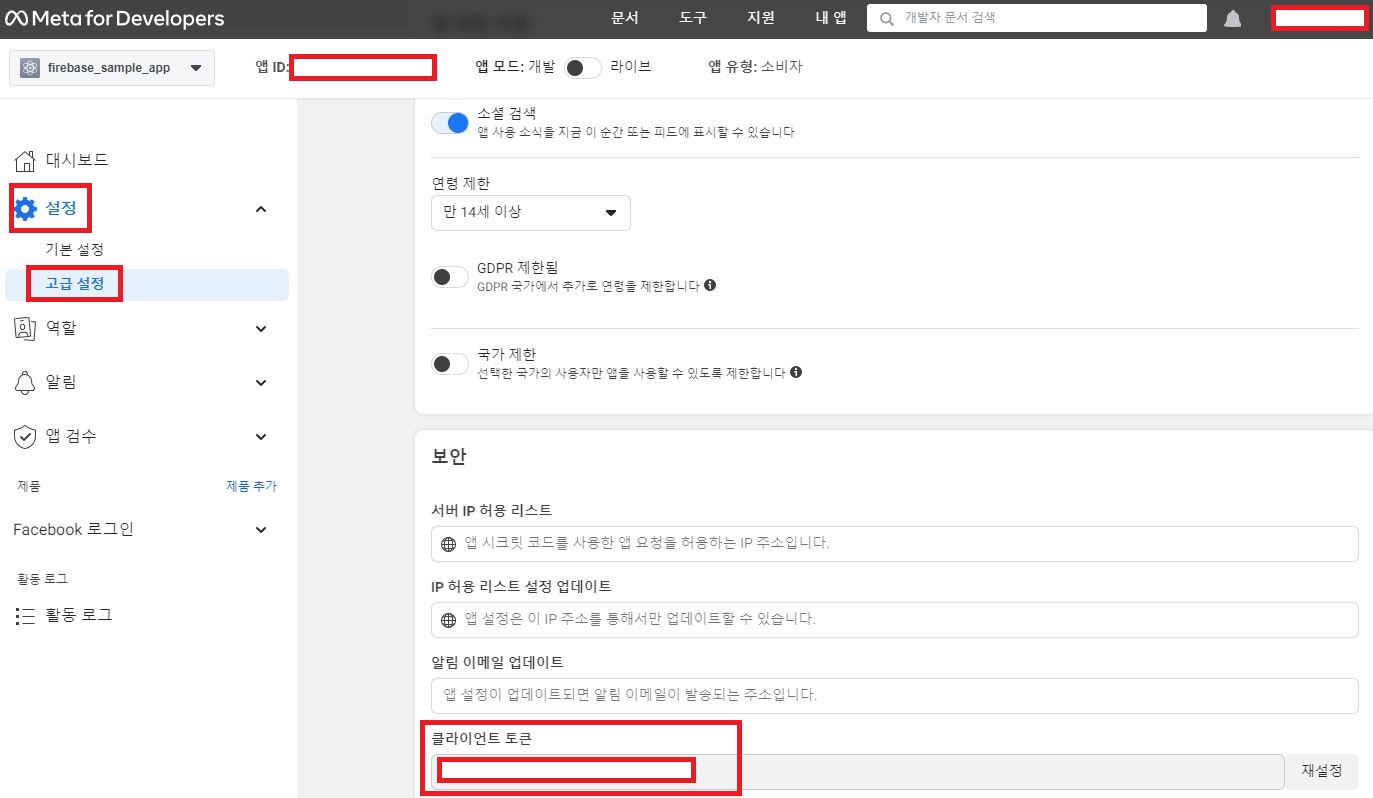
- facebook_client_token 값은 대시보드에 설정 >> 고급설정에 있습니다.
android / app / src / main / AndroidManifest.xml
- AndroidManifest.xml 에 아래 추가된 부분을 넣어주면 끝납니다.
<manifest xmlns:android="http://schemas.android.com/apk/res/android"
    package="com.study.firebase_sample_app">

    <-- 추가 -->
    <uses-permission android:name="android.permission.INTERNET"/>
    <-- 추가 -->

    <application
        android:name="${applicationName}"
        android:icon="@mipmap/ic_launcher"
        android:label="firebase_sample_app">

        <-- 추가 -->
        <meta-data
            android:name="com.facebook.sdk.ApplicationId"
            android:value="@string/facebook_app_id" />
        <meta-data
            android:name="com.facebook.sdk.ClientToken"
            android:value="@string/facebook_client_token" />

        <activity
            android:name="com.facebook.FacebookActivity"
            android:configChanges="keyboard|keyboardHidden|screenLayout|screenSize|orientation"
            android:label="@string/app_name" />
        <activity
            android:name="com.facebook.CustomTabActivity"
            android:exported="true">
            <intent-filter>
                <action android:name="android.intent.action.VIEW" />

                <category android:name="android.intent.category.DEFAULT" />
                <category android:name="android.intent.category.BROWSABLE" />

                <data android:scheme="@string/fb_login_protocol_scheme" />
            </intent-filter>
        </activity>
        <-- 추가 -->

        .
        .
        .
    </application>
</manifest>
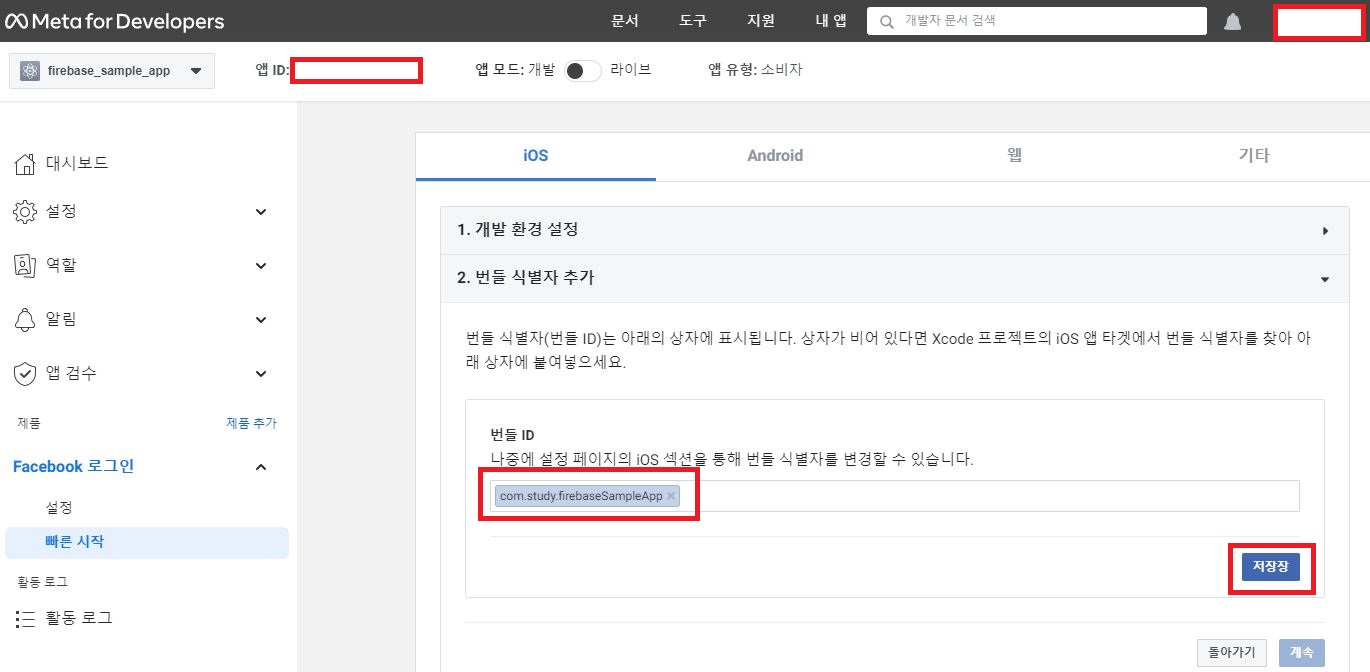
IOS 설정
- 빠른 시작에서 IOS 를 눌러줍니다.
- 번들 ID 를 넣어주세요.
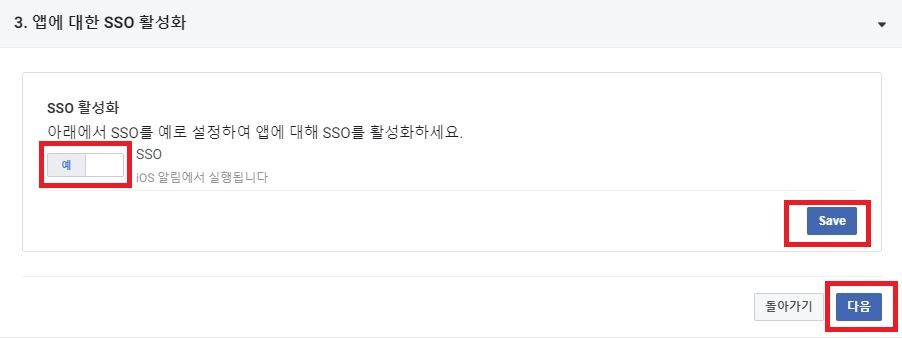
- SSO 활성화 에서 '예' 설정
IOS info.plist 설정
ios / Runner / info.plist
- info.plist 에서 추가된 코드를 넣어줍니다.
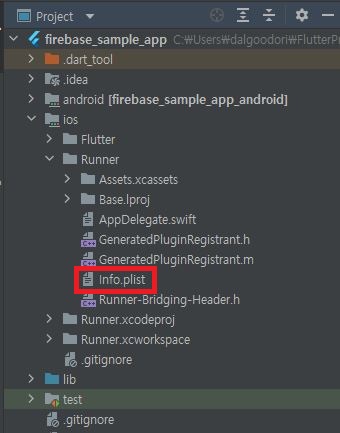
- 안드로이드와 동일하게 fbappID, appID, clientToken 값을 넣어주면 설정이 끝납니다.
<?xml version="1.0" encoding="UTF-8"?>
<!DOCTYPE plist PUBLIC "-//Apple//DTD PLIST 1.0//EN" "http://www.apple.com/DTDs/PropertyList-1.0.dtd">
<plist version="1.0">
<dict>
    .
    .
    .
    <-- 추가 -->
    <key>CFBundleURLTypes</key>
    <array>
      <dict>
      <key>CFBundleURLSchemes</key>
      <array>
        <string>fbAPP-ID</string>
      </array>
      </dict>
    </array>

    <key>FacebookAppID</key>
    <string>APP-ID</string>

    <key>FacebookClientToken</key>
    <string>CLIENT-TOKEN</string>

    <key>FacebookDisplayName</key>
    <string>APP-NAME</string>

    <key>LSApplicationQueriesSchemes</key>
    <array>
      <string>fbapi</string>
      <string>fb-messenger-share-api</string>
    </array>
    <-- 추가 -->
</dict>
</plist>
728x90
반응형
'Flutter > Social Login' 카테고리의 다른 글
| [Flutter] Kakao Login ② - 구현 (1) | 2022.08.23 |
|---|---|
| [Flutter] Kakao Login ① - 준비 (3) | 2022.08.22 |
| [Flutter] Google Login ② - 구현 (2) | 2022.08.21 |
| [Flutter] Google Login ① - 준비 (1) | 2022.08.19 |
| [Flutter] Facebook Login ② - 구현 (0) | 2022.08.19 |