Flutter/UI
[Flutter] BottomNavigationBar
찌김이
2022. 8. 9. 16:12
728x90
반응형


웬만한 앱에는 다 있는 BottomNavigationBar 에 대해서 포스팅 합니다.
BottomNavigationBar
- Scaffold 내부에 bottomNavigationBar 를 통해 구현합니다.
- BottomNavigationBar 위젯에 List<BottomNavigationBarItem> items 속성을 필수로 받습니다.
import 'package:flutter/material.dart';

class SampleScreen extends StatefulWidget {
  const SampleScreen({Key? key}) : super(key: key);

  @override
  State<SampleScreen> createState() => _SampleScreenState();
}

class _SampleScreenState extends State<SampleScreen> {

  @override
  Widget build(BuildContext context) {
    return Scaffold(
      appBar: AppBar(),
      bottomNavigationBar: BottomNavigationBar(
        items: [
          BottomNavigationBarItem(
            icon : Icon(Icons.home),
            label : 'home'
          )
        ]
      ),
    );
  }
}
속성
1. SelectedItem
- SelectedItem 은 선택된 BottomNavigationBarItem 이며 꾸미는 인자는 다음과 같습니다.
// 선택된 Item 의 아이콘 크기
iconSize = 24.0,

// 선택된 Item 의 색상
// selectedItemColor 가 설정되지 않아야 합니다.
Color? fixedColor = Colors.black,

// 선택된 Item 의 색상
selectedItemColor = Colors.black,

// 선택된 아이콘 테마
selectedIconTheme = IconThemeData(),

// 선택된 Item 의 글자 크기
selectedFontSize = 14.0,

// 선택된 Item 의 label style
selectedLabelStyle = TextStyle(),

// 선택된 Item 의 label 노출 여부 - bool
showSelectedLabels = true,
2. UnSelectedItem
- UnSelectedItem 은 선택되지 않은 BottomNavigationBarItem 이며 꾸미는 인자는 다음과 같습니다.
// 선택되지 않은 Item 의 색상
unselectedItemColor = Colors.black54

// 선택되지 않은 아이콘 테마
unselectedIconTheme = IconThemeData()

// 선택되지 않은 Item 의 글자 크기
unselectedFontSize = 12.0

// 선택되지 않은 Item 의 label style
unselectedLabelStyle = TextStyle()

// 선택되지 않은 Item 의 label 노출 여부 - bool
showUnselectedLabels = true
3. 기타
type: BottomNavigationBarType.fixed
// BottomNavigationBarItem 를 눌렀을 때 액션
onTap : (int index) {

},

// 현재 페이지
currentIndex = 0,

// 배경색
backgroundColor = Colors.white,

// Item 선택 시 효과음 여부 - bool
enableFeedback = false,

// 그림자
elevation: 10,
BottomNavigationBarItem
- BottomNavigationBar 의 items 속성에 들어가는 위젯입니다.
const BottomNavigationBarItem({
  required this.icon, // Item 의 아이콘
  this.label, // Item 의 label
  Widget? activeIcon, // Item 이 선택 되었을 때 아이콘
  this.backgroundColor, // 배경색 - BottomNavigationBarType.fixed 면 미적용
  this.tooltip, // 툴팁 메세지 - 기본값 label
})
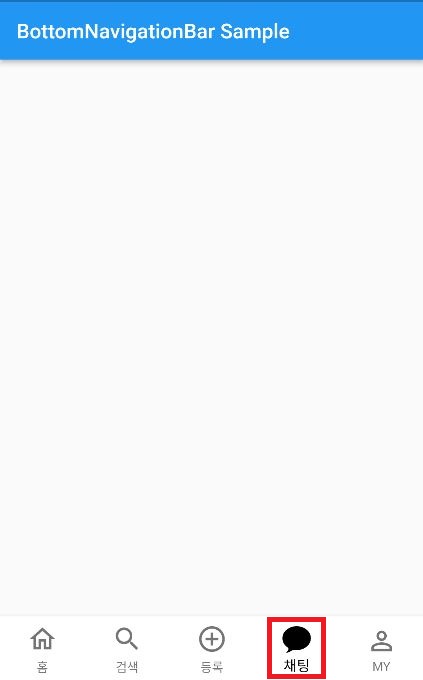
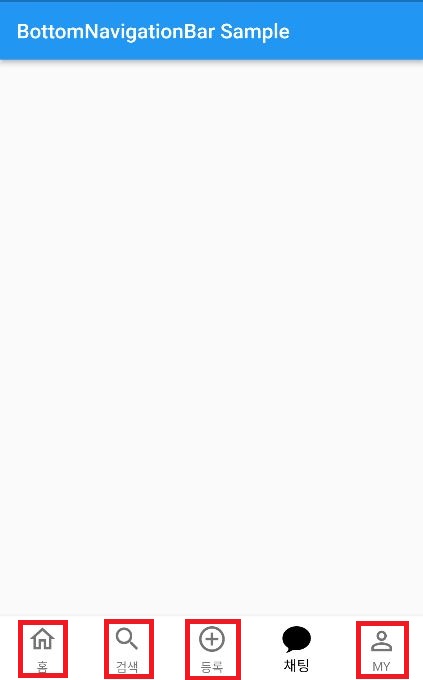
샘플 구현
- BottomNavigationBarItem 클릭 시 화면전환을 구현합니다.
- 여러 방법이 있겠지만 여기서는 Scaffold body 에 IndexedStack 위젯을 통해 화면을 전환하겠습니다.
bottom_nav_item.dart
- BottomNavigationBarItem 에 들어갈 정보를 담은 클래스를 만듭니다.
import 'package:flutter/cupertino.dart';
import 'package:flutter/material.dart';

class BottomNavItem {
  IconData iconData;
  IconData activeIconData;
  String label;

  BottomNavItem({
    required this.iconData,
    required this.activeIconData,
    required this.label,
  });
}

final List<BottomNavItem> bottomNavItems = [
  BottomNavItem(iconData: Icons.home_outlined, activeIconData: Icons.home, label: '홈'),
  BottomNavItem(iconData: Icons.search_outlined, activeIconData: Icons.search, label: '검색'),
  BottomNavItem(iconData: Icons.add_circle_outline, activeIconData: Icons.add_circle, label: '등록'),
  BottomNavItem(iconData: CupertinoIcons.chat_bubble, activeIconData: CupertinoIcons.chat_bubble_fill, label: '채팅'),
  BottomNavItem(iconData: Icons.person_outline, activeIconData: Icons.person, label: 'MY'),
];
- 화면 전환에 들어갈 화면을 만듭니다. 아래와 같은 코드로 5개 만듭니다.
import 'package:flutter/material.dart';

class HomeScreen extends StatelessWidget {
  const HomeScreen({Key? key}) : super(key: key);

  @override
  Widget build(BuildContext context) {
    return Scaffold(
      body: Center(
        child: Text(
          'HomeScreen',
          style: TextStyle(
            fontSize: 20.0,
          ),
        ),
      ),
    );
  }
}
sample_screen.dart
- 현재 index 상태를 저장하기 위해 StatefulWidget 으로 만들고 상태를 저장할 변수 _selectedIndex 를 선언해줍니다.
- IndexedStack 위젯을 만들고 children 에 만들었던 5개의 화면을 넣어주고 index 를 _selectedIndex 로 넣어줍니다.
- 이제 _selectedIndex 상태가 바뀔 때 마다 화면이 전환됩니다.
- _selectedIndex 의 상태를 바꿔주기 위해 BottomNavigationBar 의 onTap 에서 받은 index 를 _selectedIndex 에 넣어주고 setState 를 통해 상태를 갱신합니다.
import 'package:flutter/material.dart';
import 'package:../bottom_nav_item.dart';
import 'package:../chat_screen.dart';
import 'package:../my_info_screen.dart';
import 'package:../register_screen.dart';
import 'package:../search_screen.dart';

import 'home_screen.dart';

class SampleScreen extends StatefulWidget {
  const SampleScreen({Key? key}) : super(key: key);

  @override
  State<SampleScreen> createState() => _SampleScreenState();
}

class _SampleScreenState extends State<SampleScreen> {
  int _selectedIndex = 0;

  @override
  Widget build(BuildContext context) {
    return Scaffold(
      appBar: AppBar(),
      body: IndexedStack(
        index: _selectedIndex,
        children: [
          HomeScreen(),
          SearchScreen(),
          RegisterScreen(),
          ChatScreen(),
          MyInfoScreen()
        ],
      ),
      bottomNavigationBar: BottomNavigationBar(
        backgroundColor: Colors.white,
        type: BottomNavigationBarType.fixed,
        currentIndex: _selectedIndex,
        selectedItemColor: Colors.black,
        unselectedItemColor: Colors.black54,
        showSelectedLabels: false,
        showUnselectedLabels: false,
        enableFeedback: false,
        iconSize: 30.0,
        onTap: (index) {
          setState(() {
            _selectedIndex = index;
          });
        },
        items: bottomNavItems
            .map(
              (e) => BottomNavigationBarItem(
                icon: Icon(e.iconData),
                activeIcon: Icon(e.activeIconData),
                label: e.label,
              ),
            )
            .toList(),
      ),
    );
  }
}
728x90
반응형